Well hello there, fellow aspiring green thumbs! Are you ready to embark on the thrilling journey of growing your very own tomatoes from seed? Buckle up, because I’m about to share my tales of tomato triumph (and more than a few blunders) as I attempted this agricultural feat in my backyard greenhouse. Get ready for a wild ride full of laughs, lessons learned, and hopefully, a bountiful harvest of juicy red fruits at the end!
Why Grow Tomatoes in a Greenhouse?
- Protection from the elements (and pesky squirrels who love to steal your crops)
- Ability to control temperature, humidity, and other growing conditions
- Endless bragging rights at neighborhood barbecues when you casually mention your homegrown heirloom tomatoes
Step 1: Acquire Some Seeds (aka The Tomato Matchmaking Process) First things first – you need to procure some tomato seeds. Seems simple enough, right? WRONG. Little did I know, there are approximately eight million varieties of tomato seeds out there. Beefsteak, cherry, roma, heirloom, hybrid – the options are endless!
I spent hours poring over seed catalogs, reading reviews, and imagining which varieties would pair best with my famous caprese salad. It was like a high-stakes version of tomato Tinder. Swipe right for Early Girls, swipe left for Yellow Pears.
In the end, I threw caution to the wind and ordered 27 different varieties. Go big or go home, amirite?
Step 2: Start Your Seeds (aka Playing God in Tiny Dirt Cups) Next up, it’s time to plant those precious seeds and begin your tomato empire. You’ll need:
- Seed starting mix
- Seed trays or small pots
- Labels (trust me, you WILL forget which variety is which)
- A gentle misting spray bottle
- The patience of a saint
Fill your trays with the seed starting mix, carefully place 1-2 seeds in each cell, and give them a loving spritz of water. Now comes the hard part – waiting for those little green shoots to emerge.
I’ll be honest, I spent an embarrassing amount of time each day crouched in front of my seed trays, willing them to sprout with the intensity of a Jedi mind trick. “These are the tomatoes you’re looking for…”
Step 3: Provide the Right Growing Conditions (aka Tomato Helicopter Parenting) Congrats, your seeds have sprouted! Now the real fun begins. It’s your job to create the optimal environment for your little tomato babies to thrive:
Light Tomatoes need LOTS of bright light to grow strong and stocky. I thought my greenhouse would provide plenty of natural sunlight, but boy was I wrong. After a few weeks of watching my seedlings stretch and flop over like wet noodles, I realized I needed to bring in the big guns – artificial grow lights.
I may have gone a bit overboard with my light setup. My greenhouse now glows an eerie purple hue visible from space, and I’m pretty sure my neighbors think I’m running an underground rave club. But hey, anything for my tomatoes!
Temperature Tomatoes like it warm – not too hot, not too cold. Goldilocks would approve. I aimed to keep my greenhouse between 70-80°F during the day and 60-65°F at night. Easier said than done, my friends.
I spent countless hours fiddling with fans, heaters, and vents, trying to achieve the perfect balance. I even considered sleeping in the greenhouse to regulate the temperature with my body heat. My wife vetoed that idea real quick.
Humidity Tomatoes also prefer a bit of humidity, around 50-70%. But be careful – too much moisture can lead to disease and fungal issues. It’s a delicate dance of misting and ventilation.
I may have taken the humidity thing a bit too far. At one point, my greenhouse felt more like a misty rainforest than a Midwestern backyard. I half expected to see monkeys swinging from the rafters and exotic birds perched on my tomato cages.
Watering Consistent moisture is key for healthy tomato growth, but you don’t want to drown the poor things. Water deeply and allow the soil to dry slightly between waterings.
I’ll admit, I became a bit of a helicopter plant parent when it came to watering. I’d obsessively check the soil moisture levels multiple times a day, fretting over every droplet. My family staged an intervention when they caught me serenading my tomatoes with a ukulele version of “You Are My Sunshine” during a watering session.
Step 4: Transplanting (aka Playing Musical Chairs with Tomato Plants) As your seedlings grow bigger and stronger, they’ll eventually need to be transplanted into larger containers or directly into greenhouse beds. This is where things can get a bit chaotic.
Picture this: dozens of gangly teenage tomato plants, root balls tangled together like spaghetti, and one clumsy gardener trying to gently separate and relocate them. It’s like a game of vegetable Twister.
I learned the hard way that labeling is CRUCIAL during transplanting. In my haste to get everyone settled into their new homes, I may have mixed up a few varieties. Whoops! Guess we’ll find out at harvest time whether that mystery plant is a Sweet 100 cherry or a Brandywine beefsteak.
Step 5: Training and Pruning (aka Tomato Bondage) Tomatoes, especially indeterminate varieties, can grow into wild, unruly vines if left unchecked. To keep them manageable and productive, you’ll need to train them up supports and do some judicious pruning.
I experimented with various trellis systems – stakes, cages, string, and even a complex pulley contraption that would make Rube Goldberg proud. Tomato bondage became my new hobby.
Pruning was another learning curve. At first, I was hesitant to snip off any precious foliage. But after watching a few YouTube tutorials (and downing a glass of wine for courage), I became a ruthless pruning machine, removing suckers and low-lying leaves with abandon.
My tomato plants may have looked a bit naked and traumatized afterward, but I assured them it was for their own good. And the increased air flow did seem to help prevent disease. So, tough love for the win!
Step 6: Pollination (aka Playing Matchmaker for Tomato Flowers) In the cozy confines of a greenhouse, your tomatoes may need a little help with pollination. While they’re technically self-pollinating, giving them a gentle shake or using a soft brush to transfer pollen can boost fruit set.
I took my pollination duties very seriously. Armed with a fluffy makeup brush, I’d spend hours gently tickling each blossom, humming Barry White tunes to set the mood.
Sure, my neighbors may have caught me slow dancing with a tomato plant while covered in pollen, but it was all in the name of a good harvest. Don’t judge.
Step 7: Pest and Disease Control (aka Waging War on Tiny Invaders) Even in the controlled environment of a greenhouse, pests and diseases can still rear their ugly heads. Aphids, whiteflies, fungal blights – they’re all out to sabotage your tomato dreams.
I tried to take an organic approach first – introducing beneficial insects like ladybugs and praying mantises to devour the bad guys. It was like having my own tiny army of mercenaries patrolling the greenhouse.
But when a particularly nasty case of blossom end rot struck, I broke down and resorted to chemical warfare. Copper fungicide became my new best friend. I may have looked like a mad scientist, cackling maniacally as I sprayed my plants with abandon, but desperate times call for desperate measures.
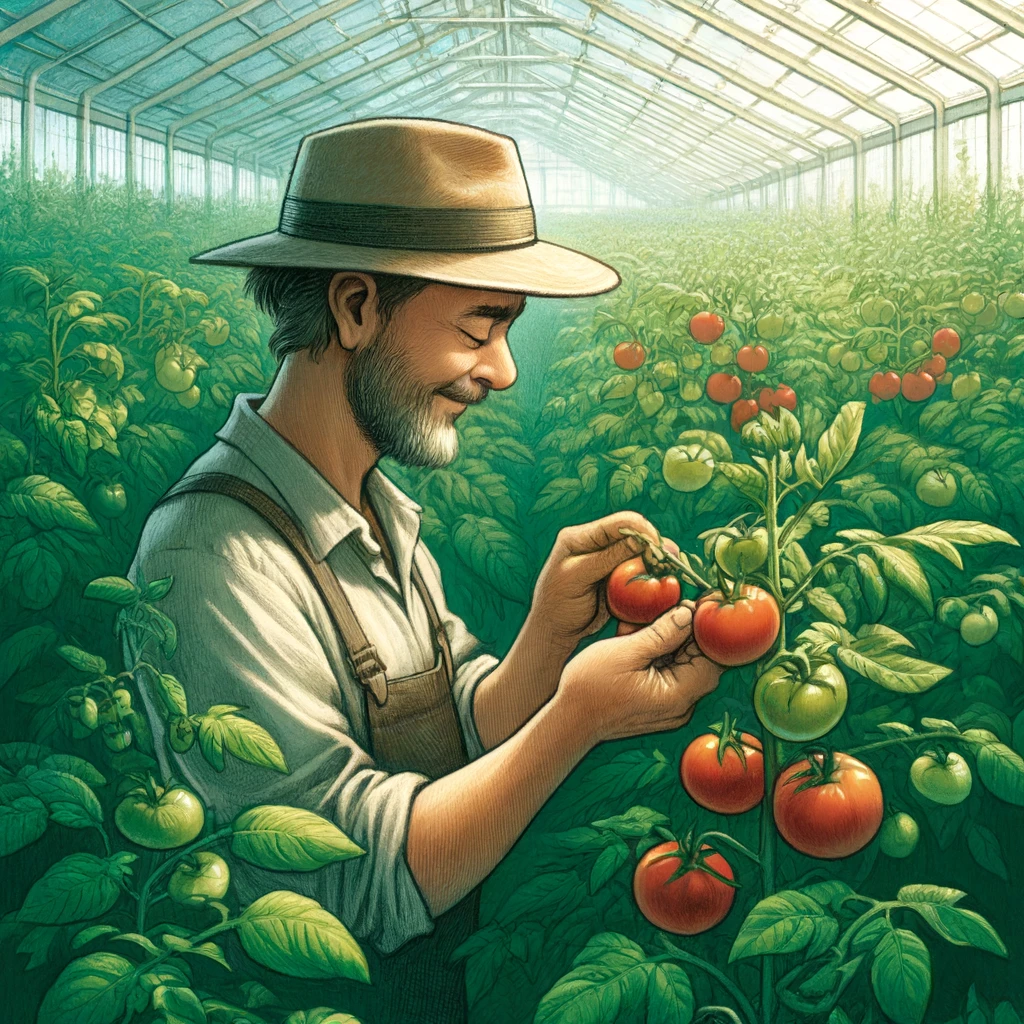
Step 8: Harvesting (aka The Moment of Truth) After months of nurturing, coddling, and talking to your tomato plants like they’re your babies, the day of reckoning arrives – harvest time!
There’s nothing quite like the thrill of plucking that first ripe, juicy tomato from the vine. It’s like winning the lottery, except instead of money, you get a delicious fruit that you can eat immediately.
I may have gone a bit overboard with my harvest celebrations. I’m pretty sure the neighbors thought I was having some kind of religious experience when they heard me shouting “HALLELUJAH!” and dancing around the greenhouse with a basket of tomatoes.
But can you blame me? After all the blood, sweat, and tears (okay, maybe just sweat and tears) I poured into those plants, I was entitled to a little tomato-induced euphoria.
Conclusion Well folks, there you have it – my completely non-expert guide to growing tomatoes from seed in a greenhouse. It’s been a wild ride full of triumphs, failures, and more than a few moments of questioning my sanity.
But in the end, as I sit here enjoying a BLT made with my very own homegrown tomatoes, I can say it was all worth it. The satisfaction of biting into a tomato that you’ve nurtured from a tiny seed to a ripe, juicy fruit is unparalleled.
So, if you’re feeling brave (or maybe just a little crazy), why not give it a try? Worst case scenario, you end up with a bunch of inedible mutant tomatoes and some funny stories to tell at parties. Best case, you become the envy of your neighborhood with your bountiful harvest of delicious, homegrown tomatoes.
Happy planting, my fellow tomato adventurers! May your greenhouses be filled with laughter, learning, and plenty of ripe, juicy fruits. And remember, if all else fails, there’s always the farmer’s market.
Recent Posts
Welcome, aspiring competitive eaters, to the world of stuffing your face with obscene amounts of food for fame, glory, and maybe a free t-shirt! Yes, that's right, we're talking about the sport where...
How to Convince Your Boss You Have a Terminal Illness to Get a Raise
Well hello there, you sneaky little schemer! I see you've found your way to this blog post in a desperate attempt to get that raise you so richly deserve. I commend you for thinking outside the box...